Elizabeth found a new recipe for us to try. It was yummy! Thanks Elizabeth! ~Pam
Oh goody it's the weekend!! =) That means bring out the sugar and see what you can make!! I decided to take a look into Mom's "MOMYS" cookbook to find a scrumptious dessert to try out. After a long look around all the chocolate, cream cheese, peanut butter, cool whip & all that good stuff.... but you probably get the idea... Mmmmm....... I decided to try out Chocolate Chip Cheesecake Bars!!!! =):) It was a good choice!(I halved the recipe since we didn't have enough of all the ingredients)
CRUST:
3/4 c. shortening
3/4 c. sugar
1/3 c. brown sugar ,packed. ( they always say packed but I never do it)
1 egg
1 1/2 tsp. Vanilla Extract
1 1/2 c. all purpose flour
1 tsp. salt
3/4 tsp. baking soda
1 1/2 c. mini choc chips
3/4 c. pecans, chopped. ( didn't put these in since I'm not a fan of nuts.)
In a mixing bowl, cream shortening and sugars. Beat in egg and vanilla. Combine the flour, salt and baking soda; add to the creamed mixture and mix well. Fold in the chocolate chips and pecan. Set aside a third of the dough for topping. Press the remaining dough into a greased 9x13 baking pan. Bake at 350' for 8 minutes.
FILLING
2 (8oz.) pkgs. cream cheese, softened
3/4 c. sugar
2 eggs
1 tsp. vanilla extract
In a small bowl, beat cream cheese and sugar until smooth. Add eggs and vanilla; mix well. Spoon over crust. Drop teaspoonfuls of reserved dough over filling. Bake at 350' for 30 to 40min or until golden brown. Cool on wire rack. Cover and store in the refrigerator.
And remember! You're not eating this for the health this time, only for taste! ;) ENJOY!
Monday, March 16, 2009
Tuesday, March 10, 2009
Gardening in KY
Here is a switch. We are going from recipes to gardening. That is another helpful homemaking skill. I am not too skilled at it but I posted about it on my other blog with Mark's help. Go here to read about it:
http://www.homeschoolblogger.com/kyhillshome/667467/
Maybe we will have more recipes soon ~ Pam
http://www.homeschoolblogger.com/kyhillshome/667467/
Maybe we will have more recipes soon ~ Pam
Friday, February 27, 2009
More Mexican from Charity
Today's recipe is from Lydia's sister in law, Charity. I like easy recipes like this for busy days. This one sounds . Thanks for sharing Charity~ Pam
I saw you had a Mexican thing going so I thought I'd share this really easy recipe I got from Sherri. She made it for us after church one Sunday when Q and Lid and Logan and I went to their house to play Dutch Blitz! It's so yummy and easy. I make it when I'm going to be getting back to the house right at dinner time after I teach piano. Enjoy!
I saw you had a Mexican thing going so I thought I'd share this really easy recipe I got from Sherri. She made it for us after church one Sunday when Q and Lid and Logan and I went to their house to play Dutch Blitz! It's so yummy and easy. I make it when I'm going to be getting back to the house right at dinner time after I teach piano. Enjoy!
Taco Soup
1 can cream of corn
1 lb. of hamburger
2 cans of Hot Chili Beans
1 can of Rotel Tomatoes
1 pkg. of Taco Seasoning
1 pkg. Ranch Dip Mix
1 cup of water
You can combine it all in a pot and cook for 20 min. but is best if you leave it in a crockpot on low all day. Even better as leftovers the next day. Super Easy and very yummy and a little spicy! We like to garnish ours with sour cream, Frito corn chips, and lots of Colby Jack Cheese!
Wednesday, February 25, 2009
Homemade Tomato Soup
Thanks for sharing this recipe Susan. Sorry I have been so slack in posting recipes. I got behind when we were sick and now our computer is sick. ~ Pam
Yum! This is a great from-scratch version of tomato soup. We had ours served hot with some slices of bacon and grilled cheese sandwiches. Very scrumptious! My husband gave this a 5 out of 5 for soups, and he's sort of particular about his soups, so that's high praise. This has a more subtle tomato flavor than the regular tomato soup you'd buy in condensed form, which means I like it better. Definitely recommended! Also, it's very easy to make.
Tomato Soup
2 tablespoons butter
1/2 onion, chopped
3 tablespoons flour
2 teaspoons sugar
1 teaspoon salt
dash of garlic powder, basil, oregano, thyme (or just use a teaspoon or so of Italian seasoning)
2 cups tomato juice
2 cups milk
Saute the onion in butter. Whisk in the flour, sugar, and salt. Season with assorted spices. Remove from heat. Stir in 2 cups tomato juice. Bring to boil, stirring constantly. Add 2 cups of milk. Return to heat, and heat to desired temperature, making sure not to scald.
Friday, February 20, 2009
Mom's Birthday
I took over Mom's blog ....Today is my Mom's birthday! =) I won't mention her age because she might not like it. =)
The last few weeks with all of us being sick and such, Mom has showed us all such a servant's heart. I've watched her get things for me while I didn't feel good, go out of her way to be a servant to all of us, and do it all so lovingly.
Also in the past few years as I have struggled with different things, and now as I struggle with trusting God and being content in Him, she so caringly has been there to pray for me, love me, and tell me things that will help in giving my life totally to Jesus Christ alone!
Recently God has shown me how blessed I am to have Pam True for my mother. =) PRAISE GOD!
Love in Jesus, Liz
Tuesday, February 17, 2009
Hoosier Pastries


Meg shared an old family recipe today. Sounds like it may be a secret recipe! Thanks for sharing Meg! ~Pam
This is a recipe from my childhood. Such memories! My friend Helen and I used to make them often when we were in junior high. I made them a few times when our kids were young, however Hannah doesn't remember them. :-/ Susan does though. So it's been a long time! I made them Friday, and they were exactly as I remembered. Joe and Hannah think they're delicious too. They're messy to make, but fun. And they're not the prettiest dessert, but I love 'em! Hannah googled Hoosier pastries and came up with nothing. So, I have no idea where this recipe came from, other than from my mom. I did grow up in Indiana, after all. ;-)
This is a recipe from my childhood. Such memories! My friend Helen and I used to make them often when we were in junior high. I made them a few times when our kids were young, however Hannah doesn't remember them. :-/ Susan does though. So it's been a long time! I made them Friday, and they were exactly as I remembered. Joe and Hannah think they're delicious too. They're messy to make, but fun. And they're not the prettiest dessert, but I love 'em! Hannah googled Hoosier pastries and came up with nothing. So, I have no idea where this recipe came from, other than from my mom. I did grow up in Indiana, after all. ;-)
Hoosier Pastries
1 pkg dry yeast (2 1/4 t)
1/4 c warm water
1 T sugar, added to yeast/water mixture
1/4 c sugar
1/2 t salt
2 sticks butter
3 egg yolks
3 egg whites, whipped
1/4 t almond extract
1/2 t vanilla
3/4 c sugar
1/2 c finely chopped nuts (I use pecans)
For the dough, mix by hand or by mixer. Combine the yeast, warm water, and 1 T of sugar, and let it sit while you continue: Combine the 3 c flour, 1/4 c sugar, and salt. Add the butter and mix well. Add yolks and yeast mixture and blend well. Divide the dough in half, and roll one half out on a sugar-sprinkled board until it's about 9" x 18".
Make the filling: whip the egg whites until white and fluffy, and add the next 4 ingredients. Pour half the filling on the 9" x 18" dough, leaving an inch margin around edges. Roll up from the long side. Cut 3/4 inch slices (I use dental floss) and place each piece gooey side up on an ungreased cookie sheet. If any filling oozes out (and it will!), spoon it up and drop on the tops of the pastries. Space them like you would cookies: they rise a little. Do the same with the other half of the dough and the rest of the filling.
Bake at 325 for 15-20 minutes, until golden brown around edges. I think they taste best at room temperature, but warm is good too. Enjoy! :-)

Saturday, February 14, 2009
More Mexican
Here is another recipe from Hannah. Hopefully , one day, my girls will be as excited about cooking (or is it the eating part ? ) as Hannah. Hannah and Miriam went to Mexico together and got to eat true Mexican food. Thanks for sharing Hannah! ~ Pam
My favorite "spicy" memories would have to come from México. It's a great place for them! Being grande, rubia (blond), and not used to extremely spicy foods, I couldn't have felt more gringa.
 The last full day of our 4-week stint in Guadalaraja, Miriam and I went with Mrs. Susan to eat at una pequeñita Tacquería owned by a couple in the church. We got there, and Jesús (the husband) started preparing our tacos right away. I could smell the grease – they looked so delicious! Mrs. Susan kindly reminded him "Son gringas, no deben ser muy picantes." (they shouldn't be very spicy for the gringas") "Claro, yo sé, no son picantes para nada " respondió. (of course, I know, they're not at all spicy)
Miriam and I sank our teeth into those "not spicy" tacos and instantaneously felt flames leaping out of our mouth. Wow! Any hotter, and I really don't think I could have continued. Sweating, tears forming in our eyes, we plunged on with our meal, taking big tragos de agua and breathing hard in between mouthfuls. Despite the unexpected bite from the spice, it was really quite rico. But I have to say that it was the spiciest thing I've ever eaten. Patético considering, for a Mexican, it was "not at all spicy". Ha!
I have developed a great appreciation for spicy cuisine these past few years, so my hope is that I've succeeded in killing some taste buds and building up a tolerance to spiciness for the next trip.
De todos modos, aquí llegamos a mi razón de escribir este post… I wanted to share a recipe that's recently become a family favorite: fajitas!
Otra receta mexicana? Once again, it seems like I'm copying recent recipe ideas, but I'm really not! I didn't even see the previous post until submitting this one. De verdad.
Up until about a year ago, I thought fajitas were pretty good, but didn't get very excited about them. Our recipe was just so-so. It was only sort of spicy and just not very flavorful. We all agreed that something was lacking, but never ran across or really spent time looking for a better recipe.
Our friends served us their fajitas one evening when we were at their place, and we finally knew what a real fajita tasted like. One bite and I felt like my mouth truly was overflowing with flavor. My eyes grew wide and all I could think was "Oh wow. This… is… so… flavorful!" I couldn't get enough of it.
So, our old fajita recipe se fue a la basura para siempre and we've happily adopted this one. It uses a lot of spices, which is why it's so amazingly rico. I have to admit that I'm surprised my mom really likes it so much. She's not usually into comida muy picante, and this is quite spicy. All of us in our little three-some really, really enjoy it.
La receta :
2 lbs. skinned and boned chicken breasts
1 tbsp red chili powder (or more if you like it spicier)
1 tbsp cumin
1 tbsp black pepper
2 tbsp garlic powder
2 tbsp onion powder
1 tbsp salt
5 tbsp vegetable oil
1-2 bell pepper, in strips (or more, if you like pepper)
1-2 onion, in strips (or more, if you like onion)
Tortillas, sour cream, guacamole, chopped tomatoes, refried beans, lettuce
Directions
In a small bowl, mix together spices for rub. Trim chicken and cut diagonally into strips. Add oil and mix well. Toss with spice rub, cover and marinate 15 mins to several hours. Stir-fry meat; when almost done add vegetables and stir fry. Wrap meat in tortillas and garnish with guacamole, sour cream, beans, cheese, and lettuce. Serves about 6 people.
(this picture does NOT do them justice, but I was too focused on eating my fajita to get a good picture... lo siento!)
Saturday, February 7, 2009
Mexican Recipes
The recipe today is from my new friend, Lisa Gonzales. We ate with them a few Sundays ago. They said they were making nachos and we thought we were having chips with some cheese on them but boy were we in for a pleasant surprise! My family all said they felt like they were at a Mexican restaurant! It was delicious! At first Lisa sent the basic outline of what we had but then I explained to her that I didn't know how to make Spanish rice and I wanted to know how she got her refried beans to taste that way. So she wrote back and shared recipes- except the secret family salsa recipe ( sad for us because that salsa was very good) Thanks for sharing Lisa.
Nachos
Bag of corn chips (or if you have a group like mine several bags)We call these chips Tortilla chips
chicken ( or any other meat such as ground beef flavored with taco season, or shredded beef)
refried beans
Spanish rice
nacho cheese
toppings:
guacamole
sour cream
salsa
sliced olives
diced tomatoes
Spanish rice
Using the same 2 to 1 ratio as white rice, this is the basic measurements I use to feed my family with a little extra for leftovers ( Lisa has 5 children )
2 cups white rice
4 cups water
1 1/2 Tbsp. powdered chicken bullion
1/2 tsp. ground cumin
1/2 of a 8 oz can of tomato sauce ( or more if you like the tomato flavor stronger, a full can is good too!)
With about 1 Tbsp. of oil, brown rice to light golden brown, all of the rice does not have to be browned, but the majority of it. Add your water and seasonings and stir well. Cover and bring to a boil and turn heat down to a low simmer until all water had dissolved into rice. Let sit about 5 min before serving.
Refried beans
I like to use both pinto and white northern beans half and half using about 3 cups of beans and twice the amount of water.
Wash and rinse beans and boil until tender about three hours. Usually if I have it on hand I like to use rendered bacon grease for a lot of flavor. If I do not have that I will use lard or any other oil I have on hand. Bacon lard gives the best flavor. Using enough oil to cover the bottom of your frying pan about 1/8 of an inch deep, getting it nice and hot add 2 chopped green onions and let your onion brown. Pull out onion and add your beans with some of the bean juice, very carefully because it does splatter pretty good! Add your salt, a little garlic salt is good too, stir beans letting them cook for about 4 to 5 min. Begin smashing beans adding some more bean juice to get your beans to your desired consistency. I add my salt to taste, sometimes your bacon grease can be salty already so taste as you go before you add more! For nachos these beans are done, for a side dish with a meal add some shredded cheddar cheese and stir into beans and add a little more to the top to melt.
Whenever I make my meats for Nachos I usually slow cook either chicken or beef in the slow cooker all day and season it with what ever I have on hand. For the chicken I like to use a fajita seasoning that has everything already in it. For my beef, I like to throw in a bell pepper, onion, bay leaf, about 3 garlic cloves, salt and about 2 Tbsp of chili powder and enough water to cover a my meat about a quarter of the way. All of this taste just as good with the chicken also. For about 1 1/2 lbs ground beef I brown with diced onion, and then season with about 2Tbls of cumin, 1 Tbsp of chili powder, garlic salt and pepper and squirt half of a lemon into the cooked and seasoned meat.
Guacamole
3 ripe avocados
1 1/2 cups of sour cream
Garlic salt and pepper to taste
In a bowl place your avocado and sour cream together and using a potato masher , mash together and season to taste!
On Sunday I used store bought Tostedo nacho cheese sauce ( medium)
For homemade cheese sauce I will have to make and note the amounts of ingredients and then I can submit that recipe. I have learned to cook like my dad! He never measures. It makes for an interesting meal sometimes. The salsa is a family recipe and I can not give that out, but I love to make it for whoever enjoys it!!
This meal is great for gatherings because everyone can make it to their liking!!
Friday, January 30, 2009
Chicken Broccoli Alfredo
Finally, a recipe from one of my daughters, Miriam. We tried Terry's Broccoli Cheese soup this week and it was very good. Mark looked at the soup and rolls and asked where's the meat- just kidding Terry!
Chicken Broccoli Alfredo
1# Linguine/fettuccine (I think we did more like 1 1/2#)
2 cups broccoli(cooked)
4Tbsp. butter
3 ch. breasts (cut into cubes)
1c. milk
3/4c. Parmesan cheese
1/4tsp. pepper
2tsp. garlic
mushrooms (we did just one can, but fresh would be much better!)
1 can cream of mushroom soup(or cream or mushroom roasted garlic--if you did this one you might cut down on the garlic)
Cook noodles. Cook your broccoli. Heat butter and add chicken and cook until tender. Stir in soup, milk, cheese, pepper, linguine, mushrooms, garlic, and broccoli. Cook until hot and bobbling.
This was SOOO good! Definitely a keeper! =) We had it with Italian bread. YUMMY!
Tuesday, January 27, 2009
Black Bean Pumpkin Soup
Now this recipe sounds like a pregnant woman must have put it together, especially when you get to the garnish. Terry, are you sure about this one? ~smile
About your comment at the bottom... Mark says that happened 27 years ago!!! Will you please forgive him?!? He has learned to be more tactful ~ smile .
Thanks for sharing again. Pam
Black Bean Pumpkin Soup (I know this sounds like a strange combo, but trust me - it's yummy!)
Gourmet, November 1996
Yield: 9 cups
Three 15 1/2 ounce cans black beans (about 4 1/2 cups), rinsed and drained
1 14.5 can of whole tomatoes tomatoes, chopped (I'm sure diced tomatoes would be fine)
1 1/4 cups chopped onion (1 large)
2 garlic cloves minced (recipe called for 4 cloves but I held back for Danny's sake)
1 tablespoon plus 2 teaspoons ground cumin
1 teaspoon salt
1/2 teaspoon freshly ground black pepper
1/2 stick (1/4 cup) butter
4 cups beef broth (3c broth + 1 c water)
1 16-ounce can pumpkin puree (about 1 1/2 cups)
1/2 cup dry Sherry
1/2 pound cooked ham, cut into 1/8-inch dice (I used cooked chicken breast) I did have the ham at a friend's and it was yummy too.
Garnish: sour cream and coarsely chopped lightly toasted pumpkin seeds. I did not use the pumpkin seeds to garnish, but I did have some ingredients on the table to use for garnish, IF desired. I know it sounds strange, but I had this garnish for a black bean soup I had at a real nice restaurant - dill pickles (diced), I also had some slices of avocado. I'm known to be weird w/some of my food stuff (but as Lois says, "a good weird")
In a food processor coarsely puree beans and tomatoes.
In a 6-quart heavy kettle cook onion, garlic, cumin, salt, and pepper in butter over moderate heat, stirring, until onion is softened and beginning to brown. Stir in bean puree. Stir in broth, pumpkin, and Sherry until combined and simmer, uncovered, stirring occasionally, 25 minutes, or until thick enough to coat the back of a spoon.
Just before serving, add ham (or as I did - chicken) and simmer soup, stirring, until heated through. Season soup with salt and pepper (we did not add extra salt).
I'm not going to rate this - I won't share things that we don't think are good :-) BUT if any of you try any of my recipes please feel free to rate them - it won't hurt my feelings because I am not the originator :-) Just don't rate them when I serve them to you here at the house :-) now that may hurt my feelings (ask Mark!) :-)))) hahahaha
If you ever have questions w/recipes feel free to email me Truetribes@juno.com :-) Terry
Monday, January 26, 2009
Crepes with Hannah
Thanks to Hannah for sharing with us! Sounds like she had fun! ~Pam
I’m too excited, yes even getting some chills right now, thinking of a blog where I can share some of my cooking adventures! Just you wait all you lucky people out there! You don’t know what you have coming. It’s Hannah Garrison.
*gasps are heard from people in front of their computer screens around the US*
People instantly IM or GT a True to check up on this name.
“I’ve heard about her. Doesn’t she eat peanut butter on eggs? Doesn’t she use ketchup as a salad dressing?”
Yes, so I have weird tastes sometimes, almost like I’m perpetually pregnant, but I also have normal tastes, too. I just really enjoy food. I love being in the kitchen (except when it needs cleaning). I love shopping for food.
First I have to spread the word about a website I stumbled across not long ago. I hesitate to share it. It’s almost like sharing some sort of addictive drug. “Here, have some! It’s good!” Seriously, it's dangerous, so beware and don't say I didn't warn you. I check it about every day and drool over the food pictures, browsing the recipes, and getting ideas that rarely actually take shape. Hey, it’s good to dream sometimes.
The website? : http://www.tastespotting.com/ How does every contributor on this site make their pictures look so delectable? I want to take pictures like that.
It was through this website that I stumbled across this cake. I decided it looked too cool and intriguing not to try it. Find the recipe here: http://creampuffsinvenice.ca/2007/06/17/the-real-crepe-cake/
I know... crepes again? What a coincidence! :) I do hope you know that Feb 2 is Crepe Day in France. It's that time of year.
Day 1 - Monday
First I look at the ingredients… they all look very basic; we have everything but whipping cream. Wait. Kirsch? What is that? I quickly do a google search and get on Wikipedia. I love Wikipedia. A cherry water. Hm. More searching on google, and I find that only some groceries stores carry it, it may be easier to find at your local liquor store (hm, no thanks), and that a substitution of something like almond flavoring wouldn’t be too off-base. After checking at Publix and Kroger and getting blank stares at customer service, I decide to ditch the Kirsch and go the almond flavoring route. Anyone every heard of Kirsch or used it?
Day 2 – Tuesday
It’s time to put the crepe batter together to chill in the fridge overnight! No big obstacles. Everything goes fine.
Day 3 - D-day
I get home from school to start prep plenty early to get everything done so it can chill in the fridge a couple of hours before taking it to Home Fellowship. First thing's first... the pastry cream!
Step #1 - the pastry cream
Looking at the directions, my mom and I are waiting for the end to say... "And finish by doing a twirl on your pinky finger before gently setting in the fridge to chill." Are all the steps really necessary? Does it have to be this complicated? We remark to each other several times, wondering if it would really make a difference if we boiled the milk with the vanilla, set it aside for only 5 minutes, or waited until the temperature went down to only 150. Well, we tried to follow it exactly as best we could! We didn't know what false move might cause an explosion or worse. ;)
Mom seemed to think that pressing it through the sieve wasn't super important, but I did think that it caught a suprising amount of impurities and little specks. In my opinion anyway, so I thought it was a good step to purify it. Although, yes, it probably really didn't make much of a difference.
I’m too excited, yes even getting some chills right now, thinking of a blog where I can share some of my cooking adventures! Just you wait all you lucky people out there! You don’t know what you have coming. It’s Hannah Garrison.
*gasps are heard from people in front of their computer screens around the US*
People instantly IM or GT a True to check up on this name.
“I’ve heard about her. Doesn’t she eat peanut butter on eggs? Doesn’t she use ketchup as a salad dressing?”
Yes, so I have weird tastes sometimes, almost like I’m perpetually pregnant, but I also have normal tastes, too. I just really enjoy food. I love being in the kitchen (except when it needs cleaning). I love shopping for food.
First I have to spread the word about a website I stumbled across not long ago. I hesitate to share it. It’s almost like sharing some sort of addictive drug. “Here, have some! It’s good!” Seriously, it's dangerous, so beware and don't say I didn't warn you. I check it about every day and drool over the food pictures, browsing the recipes, and getting ideas that rarely actually take shape. Hey, it’s good to dream sometimes.
The website? : http://www.tastespotting.com/ How does every contributor on this site make their pictures look so delectable? I want to take pictures like that.
It was through this website that I stumbled across this cake. I decided it looked too cool and intriguing not to try it. Find the recipe here: http://creampuffsinvenice.ca/
I know... crepes again? What a coincidence! :) I do hope you know that Feb 2 is Crepe Day in France. It's that time of year.

Day 1 - Monday
First I look at the ingredients… they all look very basic; we have everything but whipping cream. Wait. Kirsch? What is that? I quickly do a google search and get on Wikipedia. I love Wikipedia. A cherry water. Hm. More searching on google, and I find that only some groceries stores carry it, it may be easier to find at your local liquor store (hm, no thanks), and that a substitution of something like almond flavoring wouldn’t be too off-base. After checking at Publix and Kroger and getting blank stares at customer service, I decide to ditch the Kirsch and go the almond flavoring route. Anyone every heard of Kirsch or used it?
Day 2 – Tuesday
It’s time to put the crepe batter together to chill in the fridge overnight! No big obstacles. Everything goes fine.
Day 3 - D-day
I get home from school to start prep plenty early to get everything done so it can chill in the fridge a couple of hours before taking it to Home Fellowship. First thing's first... the pastry cream!
Step #1 - the pastry cream
Looking at the directions, my mom and I are waiting for the end to say... "And finish by doing a twirl on your pinky finger before gently setting in the fridge to chill." Are all the steps really necessary? Does it have to be this complicated? We remark to each other several times, wondering if it would really make a difference if we boiled the milk with the vanilla, set it aside for only 5 minutes, or waited until the temperature went down to only 150. Well, we tried to follow it exactly as best we could! We didn't know what false move might cause an explosion or worse. ;)
Mom seemed to think that pressing it through the sieve wasn't super important, but I did think that it caught a suprising amount of impurities and little specks. In my opinion anyway, so I thought it was a good step to purify it. Although, yes, it probably really didn't make much of a difference.
Let me start by saying that this step should have started earlier. I really was trying to keep on top of things, read ahead, anticipate future steps, but I fell flat on this one. Soon before I wanted to start making the crepes, I read that the batter needs to be "room temperature" before starting. Rats. I rush to the fridge and grab out the batter, wondering where in our ice pit (er, "house") might be the warmest spot. We find a nook on the couch by the window in the sun and leave it there for a little while before the sunny spot turns not-so-sunny and, for lack of a better place, I plop the container in my lap and coax it to warm up.
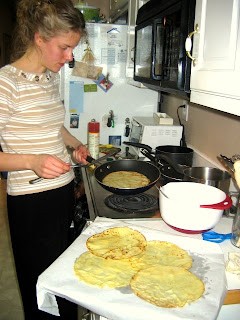
When it's warm "enough", we start the crepes! I was most worried about this step. I watched a youtube video by Martha Stewart on making crepes, and she made it look SO easy, but I still wasn't so sure. What I saw on the video was that you poured a couple tablespoons of batter into the pan, evened it out, let it cook a couple minutes, and then flipped it with your fingers and a small spatula. It didn't look too hard. I could do this, right? I lightly oiled the pan, heated it to medium, and poured the batter on. When it looked ready to flip, I eased up one side of the crepe, took it gently with my fingers to turn it, and...
OUCH!
What kind of fingers does Martha Stewart have?! That HURTS. That crepe was ruined; maybe if I try doing it really quickly next time. I repeated the first steps and once again... OUCH! I ended up with a mound of dough in the pan. This was not turning out; I was vowing never to make another crepe again. Using a spatula seemed impossible; it was so delicate.
Mother Dear kept suggesting that I leave them to cook a little longer and get brown. I have a tendancy to undercook things, and am usually abnormally scared of getting bread, eggs, pancakes and such overdone, so it took some coaxing, but I finally let one cook a little longer and then carefully turned it with the spatula. It kind of worked! It wasn't the most beautiful crepe, but it didn't end up a big doughy glob at least.
Little by little I got the hang of it, and by my last crepe, I was almost feeling like an expert.
I might add in here something else I learned in this crepe-making adventure, that over-greasing the pan leads to less appetizing crepes. I had to swab some out a couple times; the pan almost seemed to be producing oil each time, if that was possible.
Step #2 - the whipped cream
Mother Dear actually did this while I made the crepes. She then combined with the pastry cream from the previous day and started layering while I was finishing up the crepes.
The rest of the process was fairly easy. We simply layered, I had fun with a little decorating at the end (I like turning food into works of art), which Mother Dear seemed to think simply looked weird (she doesn't appreciate true art), and then we put it in the fridge to cool, albeit a bit late.
So... the final decision on this cake. To make again or not?
Honestly, it just wasn't my thing. I didn't really enjoy it that much. Some people at our Home Fellowship thought it was very good and raved about it. It looked kind of neat. It was different and a fun experience all-in-all. But, I wouldn't do it again.
If I did something similar, I would alternate a whipped cream type of layer with a layer of strawberry preserves or something. That would be yummy. But the time this took was NOT worth the product. It did give me possible ideas for the future. And I finally know how to make crepes! That's a must for every French teacher, right?
I do often have some very successful cooking ventures, so I'll have to share those later. Yes, this was a lengthy recount. Yes, if you actually read everything you do deserve a big gold star to wear. Yes, the next time I'll try to not be so wordy.
Keep experimenting!
Sunday, January 25, 2009
Cabbage casserole from Misti
Here is another one from Misti.Thanks Misti. Just so you know, I am trying to post the recipes every other day or so. If I get two in one day, I will save one. If you send in a recipe and don't see it posted in a week's time then email me about it. Try those new recipes this week!! ~Pam
I actually invented this recipe and it ended up being a family favorite that I make at least 3 times per month.
I actually invented this recipe and it ended up being a family favorite that I make at least 3 times per month.
We loved stuffed cabbage, but steaming the cabbage leaves and "stuffing" them took too much time, so I invented this.
We had it again last night so I thought I'd share:
1 small head of cabbage sliced thinly into bite sized pieces
1 pound of ground beef
2 cups dry brown rice
can of diced tomatoes or you can substitute spaghetti sauce that is yummy too.
Sour Cream (optional if you like it)
Cook 2 cups of brown rice in 4 cups of water simmering for 35 min covered on low heat.
While that is cooking...
Cook the ground beef in a large pot. Drain some of the grease but not all of it. (maybe 1/2)
Stir the cabbage into the beef and cook til the cabbage is cooked. (about 5 minutes)
Add tomatoes or sauce. Add cooked rice and stir all together.
Serve with sour cream if you like it or skip it if you don't.
THis recipe is so easy and delicious, balanced and healthy too.
You could substitute ground venison if you prefer....you could use white rice too, but it's not quite as healthy.
Friday, January 23, 2009
Susan's casserole tutorial
Today Susan, a family friend, is sharing with us. Susan hasn't been married too long-16 months. She has an adorable baby boy, Hans, to keep her busy. Thanks for sharing. Pam
Okay, here goes my first submission. It's a tutorial on making casseroles.
~~~~~~~
Before we got married, my husband told me that casseroles are "an arrow aimed straight at a man's heart". So, needless to say, I've been making a lot of casseroles in the last 16 months, since we've been married! I used to follow set recipes for casseroles, but now I rarely do. It is considerably more fun to make up a casserole recipe as I go along, and I usually make at least one casserole per week, each different than the previous one, though some old standbys do get repeated, with only slight variations. Here's my method for creating a casserole:
A good casserole consists of some type of cooked and cut up meat, a starch (potatoes, rice, or noodles), a sauce, optional additional seasonings, and optional vegetables.
Here is my basic white sauce recipe, which is super-easy to memorize and adapt:
Basic White Sauce
2 T butter, melted in sauce pan.
Stir in 2 T flour. Cook roux for 3 minutes-ish.
Add some salt and pepper.
Stir in 1 cup milk (or other liquid) and cook until thickened, stirring with whisk.
I cut up some type of meat, make up a sauce, add some cooked potatoes, rice, or noodles, stir in a can of vegetables, add a bit of seasoning, and voila! - a casserole. But. . . the key to a good casserole is invention. I'll show you what I mean. Below are a few casseroles I've "invented" from the basic casserole formula:
Casserole #1: Chicken and Brown Rice
This is a basic standby that I make, but I vary it a bit every time. I grab some cooked and cut up chicken from the freezer for this dish. (I boil, debone, and freeze chicken in meal size portions). Maybe 2 or 3 cups of meat? Then I cook up some brown rice, about 1 1/2 - 2 cups dry rice, plus water to cook, which yields 3-4 cups of cooked rice. Meanwhile I make a white sauce, maybe 2 cups or so? Sometimes I just do a regular white sauce, but often after making the sauce, I'll remove it from the burner ("eye" for y'all in the South), and stir in a cup or so of grated cheese; this makes a wonderful cheese sauce! Then I throw the rice, sauce, and chicken (thawed to room temperature) in the casserole dish and call it done. If the meat is room temperature and the sauce and rice are hot, I usually don't even put it in the oven, and it's hot enough after melding. Maybe I'll stir in some corn or green beans, or maybe I'll serve veggies on the side.
Casserole #2: Steak and potato
My husband's company had a holiday party (they were too PC to have a Christmas party. . . ), and there were lots of leftovers that employees were able to take home, so I brought back several seasoned steaks and some cooked, chopped potatoes. A casserole was born!
I cut up and cooked some additional potatoes in my pressure cooker, as I hadn't brought home enough potatoes for a whole casserole. While the potatoes cooked, I started a sauce. I used my basic white sauce recipe times 2 1/2 (to yield 2 1/2 cups sauce), but I substituted in a cup of kefir (a fermented milk product) for some of the milk, to give a buttermilky flavor to the sauce. I also seasoned the sauce with a seasoning blend called "Northwoods Seasoning" that gives a nice rich flavor. I dumped the cooked potatoes (both the leftovers and the new ones) into the casserole dish, added the chopped up steak, and then poured the sauce over all. Mixed. Popped in oven for 20 minutes or so, at 350 degrees. I served leftover vegetables (also snagged at the holiday party) on the side.
Casserole #3: Mushroom and Garlic Chicken Pasta
I pulled out some cooked and chopped chicken from the freezer for this dish. I set a pound of shell pasta to boil while I started a sauce - 3 cups this time. This time I sauteed some minced garlic and fresh mushrooms in the butter before adding the flour (I upped the butter amount a tad for the sautee). For the liquid in the sauce, I used chicken broth instead of milk - makes a wonderful sauce! I microwaved the chicken, as I hadn't gotten it to room temperature yet. Then I put the chicken, the sauce, and the pasta in a casserole dish. Oh yum. This was a scrumptious dish! Hubby agreed. I served green beans on the side.
See? Not hard. Three casseroles from one formula. And I didn't have to patronize Campbell's cream-of-whatever to make them. I could come up with a zillion more variations, but I don't want to bore you. Sometimes if I don't have a lot of meat, I'll stir in some cooked beans (black-eyed peas or whatnot) to up the protein content. The amount of liquid is not a science; it's an art. Have fun!
- Susan
Wednesday, January 21, 2009
Broccoli Cheese Soup from Terry
This recipe is from my sister in law, Terry. She is the mother of 5 but her home, like mine, is shrinking. Terry has two children still at home. She is a great cook and has always been an encourager to me.~ Pam
I made the following soup tonight and it was VERY good - rated a 5 by Danny for a cream soup.
I made the following soup tonight and it was VERY good - rated a 5 by Danny for a cream soup.
A few notes:
1) I made 2 batches (long story) one I did w/milk and it almost tasted exactly the same as the one below using half & half, just a little less rich. If you didn't have both (like we did) to compare them you'd never know the difference :-)
2) The recipe below says 4 servings - it did fill 4 bowls, BUT my people usually eat more than 1 bowl :-) You can go to the website www.cdkitchen.com and do a search for Panera Bread Broccoli Cheese Soup and then you can change the number of servings and they will figure the amount of ingredients needed on the website - pretty cool :-)
3) If you've ever had Panera's broccoli cheese soup I think you'll agree that this is as close to a duplicate as you can get without sneaking into their kitchen and stealing their recipe :-)
4) See little notes in recipe where I changed it up a bit :-)
Enjoy!!
Terry
Panera Bread Broccoli Cheese Soup
CDKitchen http://www.cdkitchen.com
Category: Broccoli Cheese Soup
Serves/Makes: 4 | Difficulty Level: 3 | Ready In: 30-60 minutes
Ingredients:
Directions:
Saute onion in butter. Set aside. Cook melted butter and flour using a whisk over medium heat for 3-5 minutes. Stir constantly and slowly add the half-and-half (this is called making a roux). Add the chicken stock whisking all the time. Simmer for 20 minutes.
Add the broccoli, carrots and onions. Cook over low heat until the veggies are tender for 20-25 minutes. Add salt and pepper. The soup should be thickened by now. Pour in batches into blender and puree *. Return to pot over low heat and add the grated cheese; stir until well blended. Stir in the nutmeg and serve. (* I only puree about 2/3 of the chunks - we like to have some chunks left in our soup)
Recipe Location: http://www.cdkitchen.com/recipes/recs/1833/Panera-Bread-Broccoli-Cheese-S79119.shtml
Recipe ID: 49903
CDKitchen http://www.cdkitchen.com
Category: Broccoli Cheese Soup
Serves/Makes: 4 | Difficulty Level: 3 | Ready In: 30-60 minutes
Ingredients:
1 tablespoon butter, melted
1/2 medium onion, chopped
1/4 cup melted butter
1/4 cup flour
2 cups half-and-half
2 cups chicken stock or bouillon
1/2 pound fresh broccoli (which is basically a good size head of broccoli)
1 cup carrots, julienned (I just sliced the carrots since you puree most of them later any way - takes less time)
salt and pepper to taste
1/4 teaspoon nutmeg
8 ounces grated sharp cheddar
Directions:
Saute onion in butter. Set aside. Cook melted butter and flour using a whisk over medium heat for 3-5 minutes. Stir constantly and slowly add the half-and-half (this is called making a roux). Add the chicken stock whisking all the time. Simmer for 20 minutes.
Add the broccoli, carrots and onions. Cook over low heat until the veggies are tender for 20-25 minutes. Add salt and pepper. The soup should be thickened by now. Pour in batches into blender and puree *. Return to pot over low heat and add the grated cheese; stir until well blended. Stir in the nutmeg and serve. (* I only puree about 2/3 of the chunks - we like to have some chunks left in our soup)
Recipe Location: http://www.cdkitchen.com/recipes/recs/1833/Panera-Bread-Broccoli-Cheese-S79119.shtml
Recipe ID: 49903
Tuesday, January 20, 2009
Recipe from Misti
Here's a recipe from my neighbor Misti. She is the mom of 7 kids and likes to cook healthy food for them. She didn't rate it but it sounds yummy. Thanks for sharing Misti! If you try the recipe be sure and comment.~Pam
I made these today and all my children really liked them. They are easy and fairly healthy too if you have whole wheat flour. We've also made them but used berries and sugar as the filling too.
I made these today and all my children really liked them. They are easy and fairly healthy too if you have whole wheat flour. We've also made them but used berries and sugar as the filling too.
Crepes with Banana Sauce
6 eggs
1 1/2 c. milk
1 1/2 c. flour (whole wheat if you have it)
4 T. butter, melted (or coconut oil)
2 t. vanilla extract
1/4 t. salt
Blend in a blender and put about 1/2c batter (or less--just want to barely cover the bottom) in greased frying pan on med heat. Cook til bottom is lightly browned and flip and cook another minute or 2.
Put some banana sauce down the middle and fold like a burrito with open ends.
Banana sauce:
3 bananas, halved lengthwise and then cut into bite-sized pieces.
1/2 c butter or coconut oil
maple syrup
2 t vanilla
cinnamon to taste
* if you don't have maple syrup, you can use 1 c brown sugar instead.
Put butter and syrup in pan to melt until a little thickened. Add vanilla, cinnamon and bananas and stir.
Sunday, January 18, 2009
Welcome to Share It
I want to challenge you to try a new recipe each week. It doesn't always have to be a main dish. It can be a new dessert or bread recipe. It can be for breakfast, lunch, or supper. Just try it and have your family rate it 1 to 5 ( 5 is the best). If you added something to the recipe tell about that.
If you don't have a recipe, maybe you have a time or cost saving tip to share. Maybe it is a random tip like the one I learned recently: when you shop, if you don't have a child along who needs the little shopping cart seat belt, use it to buckle your purse to the cart. You don't have to worry about someone snatching your purse from your cart.
Another thing you can share is something the Lord is teaching you. I read something recently in the book, Calm My Anxious Heart by Linda Dillow that really challenged me. In a chapter about contentment she tells about a missionary to Africa who lived in very difficult circumstances but with contentment. Her daughter found an old diary where her mother had written her "secrets" to contentment:
-Never allow yourself to complain about anything -not even the weather.
-Never picture yourself in any other circumstances or someplace else.
-Never compare your lot with another's
-Never allow yourself to wish this or that had been otherwise.
-Never dwell on tomorrow-remember that tomorrow is God's not ours.
So find something to share each week and "Share It"
Pam
Subscribe to:
Posts (Atom)